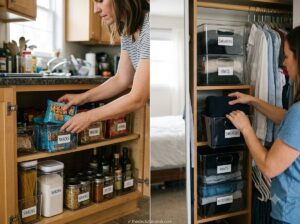
7 Genius Ways to Make Kitchen Drawers and Cabinets Feel Twice as Big (and Stay That Way)
Seven real techniques for reclaiming usable space inside kitchen drawers and cabinets, not just making them look bigger in a photo. Each one comes with the actual mechanism behind why it works and what keeps it from sliding back into chaos by month two.

Never miss an update — choose TheDeclutterDesk as your preferred source on Google.
How it works: Tap the button below to open Google’s settings page, then check the box next to TheDeclutterDesk.
Tap the checkbox to turn it blue — that’s how you know it’s set.
Seven real techniques for reclaiming usable space inside kitchen drawers and cabinets, not just making them look bigger for a photo. Expandable drawer dividers, vertical dividers for lids and trays, door-mounted storage, a lazy Susan for the corner cabinet, stacking risers, decanting into space-efficient containers, and purging duplicates before you buy anything new. About 340 square feet is the average size of a U.S. kitchen, and almost none of that is inside your drawers, so the real gains have to come from how you use the space you already have. Each technique below explains why it actually reclaims usable volume, not just visual tidiness, plus the maintenance habit that keeps it working past the first week.
1. Expandable drawer dividers turn one flat drawer into real slots
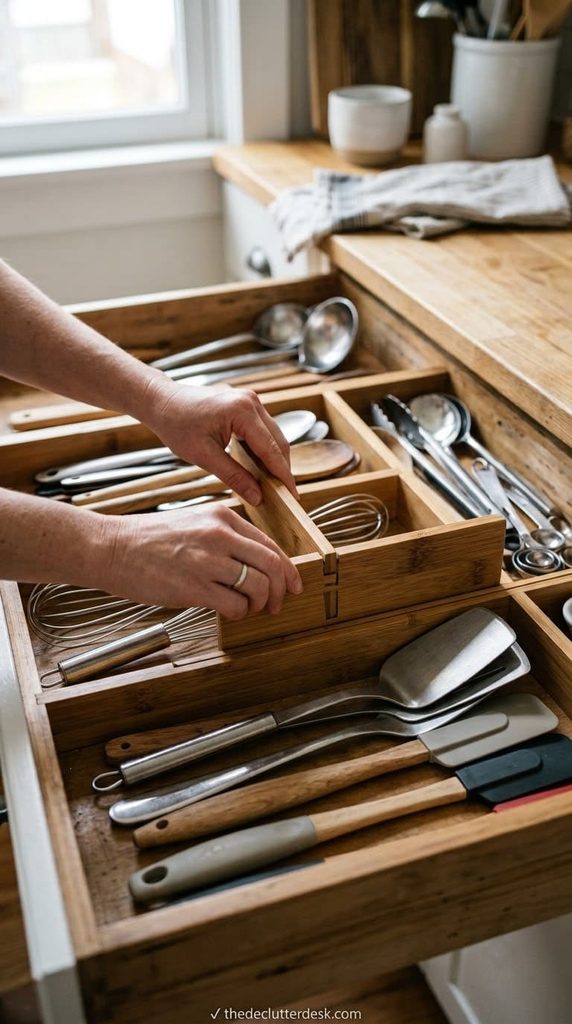
A standard kitchen drawer is one open box. Everything in it competes for the same flat footprint, so a spatula ends up under three whisks and a peeler slides to the back every time you open it.
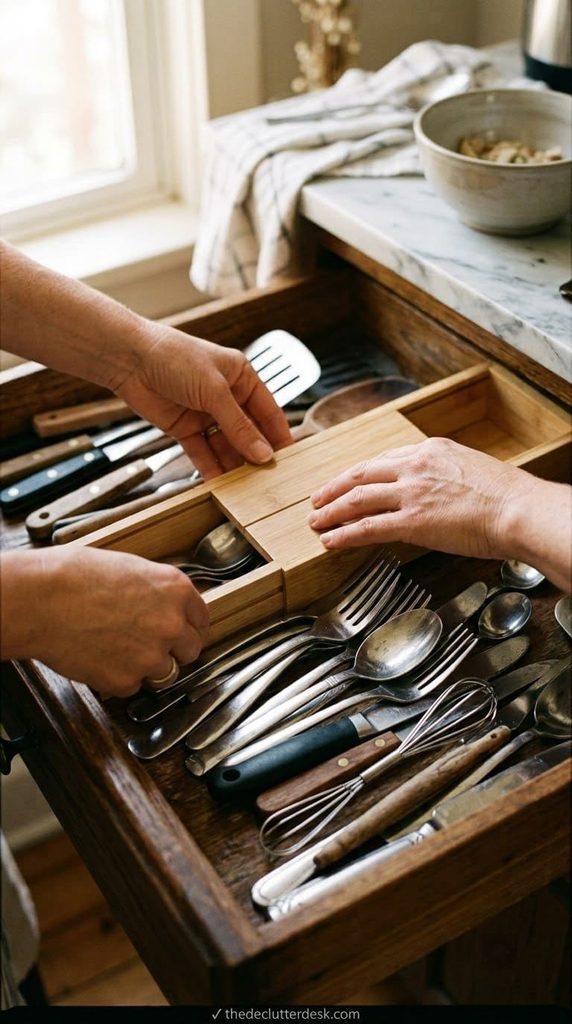
An expandable divider splits that one footprint into fixed lanes. Certified professional organizer Megan Cocchiaro, founder of Organized by Meg, recommends spring-loaded or expandable dividers specifically because they stop large utensils from piling on top of each other and eating space that smaller tools could use.
The mechanism is simple. A drawer isn’t actually short on volume, it’s short on organized volume, and a divider converts wasted vertical stacking into usable horizontal lanes you can see into at a glance.
How to do it right: measure the drawer’s interior width before buying anything, most expandable dividers run 17 to 22 inches and won’t compress smaller than their minimum length. Install the long dividers first, front to back, then use the shorter cross-pieces to build individual compartments once the main lanes are set.
The common mistake: buying dividers based on the drawer’s outer cabinet measurement instead of the actual interior clearance, which is usually an inch or two smaller once you account for drawer-box walls. That single measuring error is why so many dividers arrive and don’t fit, or fit so loose they slide the whole time you’re cooking.
Short on time? A 2-minute fix is grouping loose utensils by type with a rubber band around each cluster, not ideal, but it stops the mixing. The full version is a proper divider set installed and adjusted to your specific tools, which takes about 20 minutes for one drawer.
Renter-friendly note: expandable dividers use spring tension against the drawer walls, no drilling or adhesive required, so they come out clean when you move.
2. Vertical dividers for lids, trays, and cutting boards free up flat shelf space
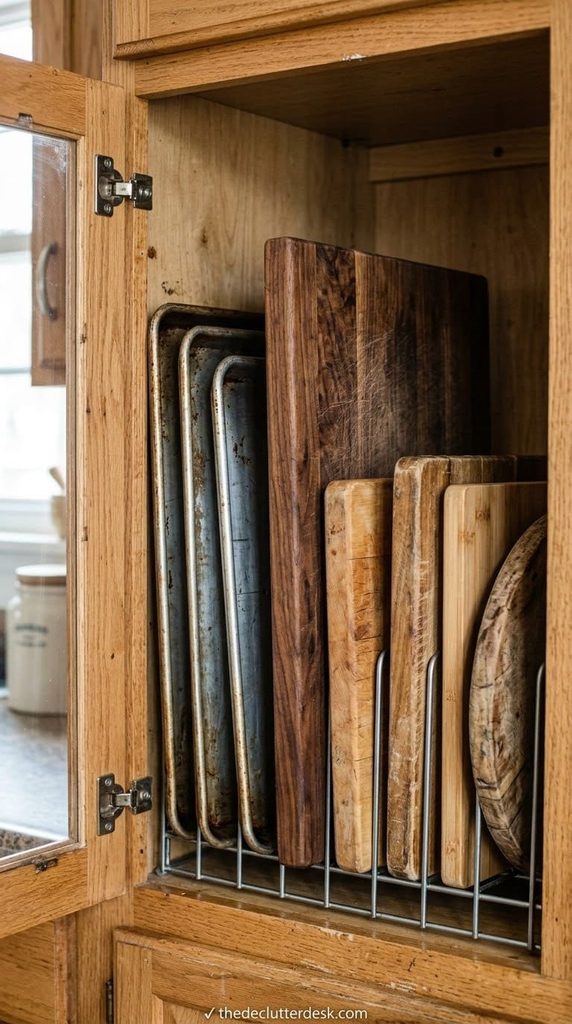
Flat, oversized items are the real space thieves in most kitchens. A stack of 3 baking sheets and 2 cutting boards can eat an entire cabinet shelf on their own, and you have to unstack the whole pile to reach the one on the bottom.
Turning that stack on its side changes the math completely. A vertical divider, the same style used for file folders, lets sheet pans, cutting boards, and pot lids stand upright in individual slots instead of nesting flat, so each one takes up a fraction of its former footprint and none of them block another.
I did this in my own kitchen after getting genuinely irritated pulling out 4 sheet pans just to grab the one I use every Tuesday for roasted vegetables. Took maybe 15 minutes and freed up almost a full shelf.
How to do it right: install the divider against the side wall of the cabinet, not floating in the middle, so it doesn’t tip when you pull an item out at an angle. Group by size, not by type, so a large stockpot lid doesn’t sit wedged against a small saucepan lid it doesn’t match.
The common mistake: buying a divider rated for a shallower cabinet than you actually have, which leaves 3 to 4 inches of dead space above the pans that just becomes a new junk shelf. Measure the cabinet’s actual interior height, not just the width, before ordering.

This is the direct fit for technique #1, spring-loaded bamboo dividers that expand from 17 to 22 inches with smaller inserts for building custom compartments inside a single drawer.
Shop NowThis post contains affiliate links. We may earn a commission on qualifying purchases at no extra cost to you.
Tiered version: a $15 wire file-style divider from a hardware store does the basic job. A full cabinet-width vertical organizer with adjustable dividers costs more but fits odd-shaped bakeware without gaps.
Household with kids variant: if little hands dig through the cabinet, add a soft-close latch or keep the heaviest cast iron pieces on the bottom slot so nothing tips forward when a drawer gets pulled too fast.
3. Door-mounted storage claims space that was never being used at all
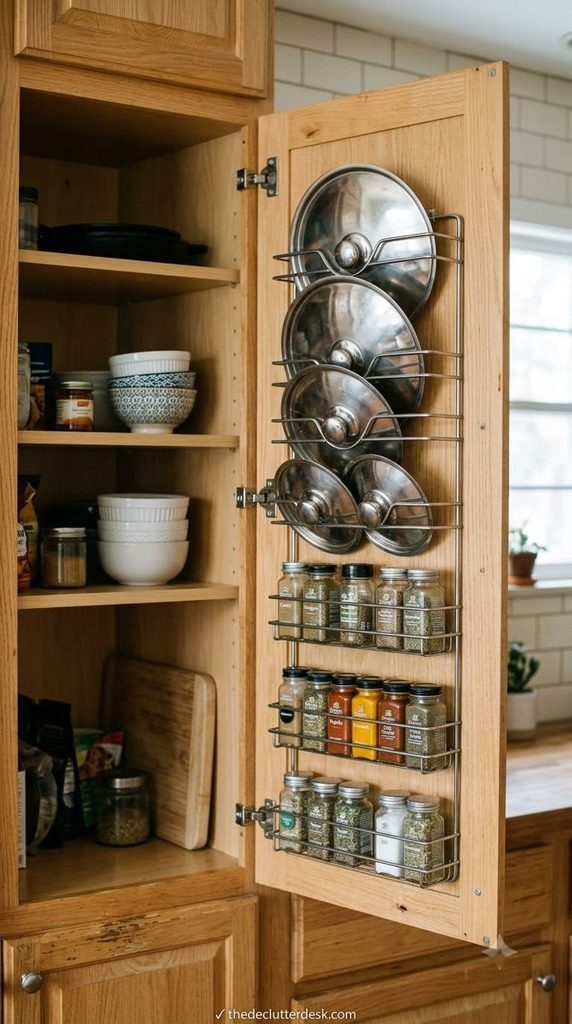
The inside of a cabinet door is dead space in almost every kitchen. It’s flat, it’s right there every time you open the cabinet, and it holds nothing except maybe a stray sticker from the manufacturer.
A door-mounted rack turns that surface into real storage without touching the shelves at all, which means it’s pure addition, not a reshuffle of existing space. Lids, spice jars, cutting boards, and even cleaning supplies under the sink can move there.
This is one of the few techniques on this list that doesn’t compete with anything else in the cabinet for room, since the door and the shelves are two separate surfaces. That’s the actual reason it reclaims space instead of just relocating clutter.
How to do it right: measure the clearance between the door and the shelf in front of it before buying a rack, most adjustable racks need 1.5 to 3 inches of clearance and a too-deep rack will hit the shelf every time the door closes.
The common mistake: mounting the rack too close to the door’s hinge side, where the swing radius is tightest, so heavier items catch on the door frame. Center it toward the middle to outer edge of the door instead.
Renter-friendly note: adhesive-mount racks exist and skip the screws entirely, though they hold noticeably less weight, so save those for spice jars and lightweight items, not a stack of pot lids.
2-minute version: hang just a single small basket for the items you dig for daily, like measuring spoons. The full weekend version fits out every lower cabinet door in the kitchen with a rack sized to what’s actually stored behind it.
4. A lazy Susan solves the corner cabinet’s blind spot
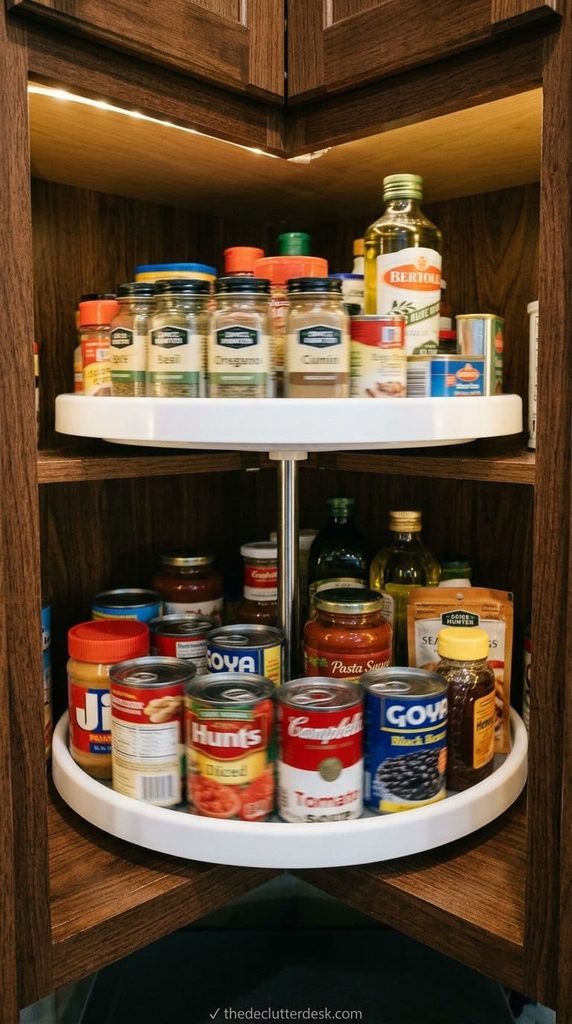
Corner cabinets are the single most wasted storage zone in a typical kitchen. The back third of that space is a blind spot you can’t see into or reach without pulling everything in front of it out first, so it quietly turns into a black hole where things go to be forgotten.
A rotating turntable solves that specific problem, not general storage. It doesn’t add square footage, it makes the square footage that was already there actually reachable, which functionally has the same effect as adding space since unreachable storage isn’t usable storage.
NAPO Seattle chapter president Linda Deppa, a certified professional organizer, uses lazy Susans to “utilize dead space in corner cabinets” in the same way she uses them under bathroom sinks and in the fridge for condiments, the mechanism is identical no matter which cabinet it’s in.
How to do it right: a 2-tier turntable, roughly 12 to 18 inches in diameter depending on the cabinet, doubles the storage on a single footprint since it stacks a second rotating level on top of the first. Group items you use together on the same tier so one spin gets you everything for that task.
The common mistake: loading tall items on the bottom tier and short items on top, which wastes the vertical clearance above the short items. Stack by height, tallest tier gets the most headroom, and the fit improves immediately.
Short on time? Even an empty corner cabinet with nothing but a $15 turntable dropped in beats the loose pile it replaced. The upgrade version adds labeled zones on each tier for spices, oils, and canned goods so everyone in the house puts things back in the same spot.
5. Stacking risers double a cabinet shelf without adding a shelf
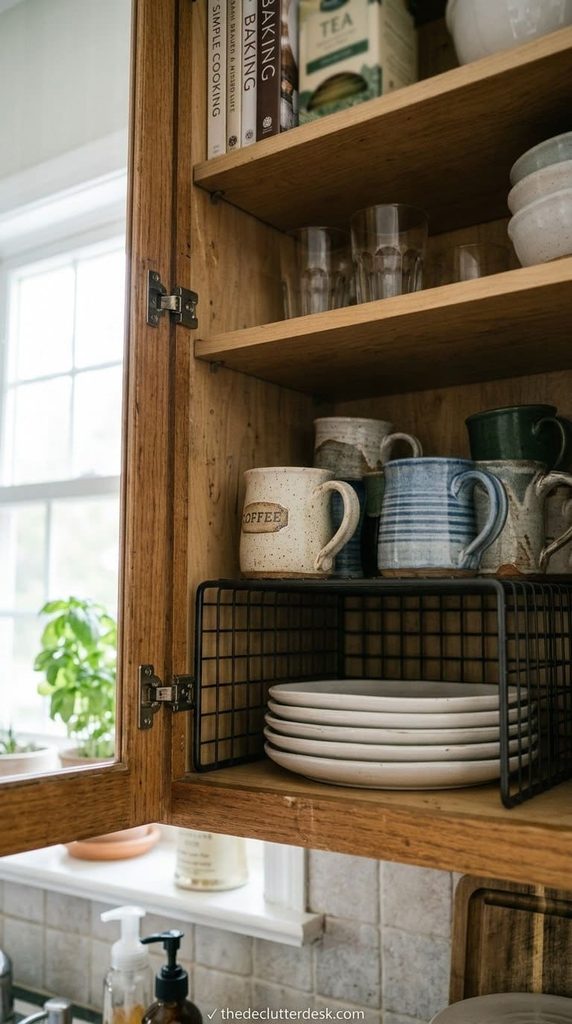
Most cabinet shelves are spaced for the tallest item that has to fit on them, which means a shelf holding short items like mugs or cans has 4 to 6 inches of empty air sitting above them for no reason.
A stacking riser reclaims that air. It’s a small metal or wire shelf that sits on the existing shelf and creates a second, elevated level above the first, so short items go underneath and more short items go on top instead of that gap sitting empty.
The mechanism here is genuinely just geometry, not a trick. You’re not adding cabinet space, you’re using height that was already inside the cabinet but was previously unusable because nothing physically divided it into a second tier.
How to do it right: measure the gap above your shortest stacked items first, most risers need 3.5 to 5 inches of clearance to fit an item underneath and still leave room on top. Put what you use most often on the lower level since it’s easier to grab without lifting the riser out.
The common mistake: stacking risers too tall for the remaining headroom, so the top tier’s items hit the shelf above and nothing sits flat, which is exactly the kind of frustration that makes people abandon an organizing system within a month. Measure twice, the riser once.
Tiered version: a basic 2-pack of wire risers runs under $20 and handles most standard cabinets. A full-width metal shelf riser costs more but spans the entire cabinet depth instead of one narrow section.
6. Decanting into space-efficient containers shrinks what you’re storing
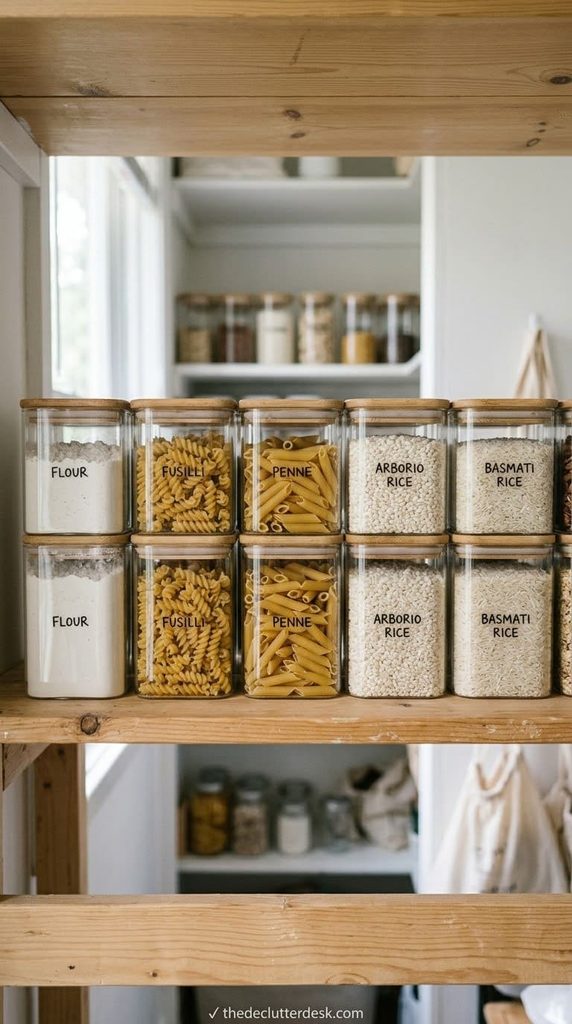
Packaging is designed to sell on a store shelf, not to store efficiently at home. Bags of flour, boxes of pasta, and round canisters are full of dead air and awkward shapes that don’t stack or nest against each other.
Decanting into uniform, square or rectangular containers reclaims that wasted air space directly, since square containers tile against each other with zero gap while round ones always leave curved gaps between them. This isn’t an aesthetic upgrade, it’s a real volume gain you can measure.
How to do it right: measure your cabinet’s interior width and depth first, then buy containers sized to fit 2 or 3 across with no wasted gap, rather than picking containers you like the look of and hoping they fit. Label everything with the purchase date, since decanted food loses its expiration date the moment it leaves the original packaging.
The common mistake: decanting perishable or short-shelf-life items like flour and grains without writing the date somewhere, which means 6 months later nobody knows if it’s still good and it gets tossed anyway, erasing the whole point of buying nicer containers.
Short on time? Start with just the 4 or 5 items you buy most often, cereal, flour, sugar, pasta, rather than trying to decant the entire pantry in one sitting, which is the kind of project that stalls out halfway and leaves half your shelves in ziplock bags.
Household with a tight budget: repurposed glass jars from pasta sauce or pickles work fine for this, they just won’t stack quite as tightly as matched square containers since the shapes vary jar to jar.
7. Purging duplicates and rarely-used items is the multiplier on everything above
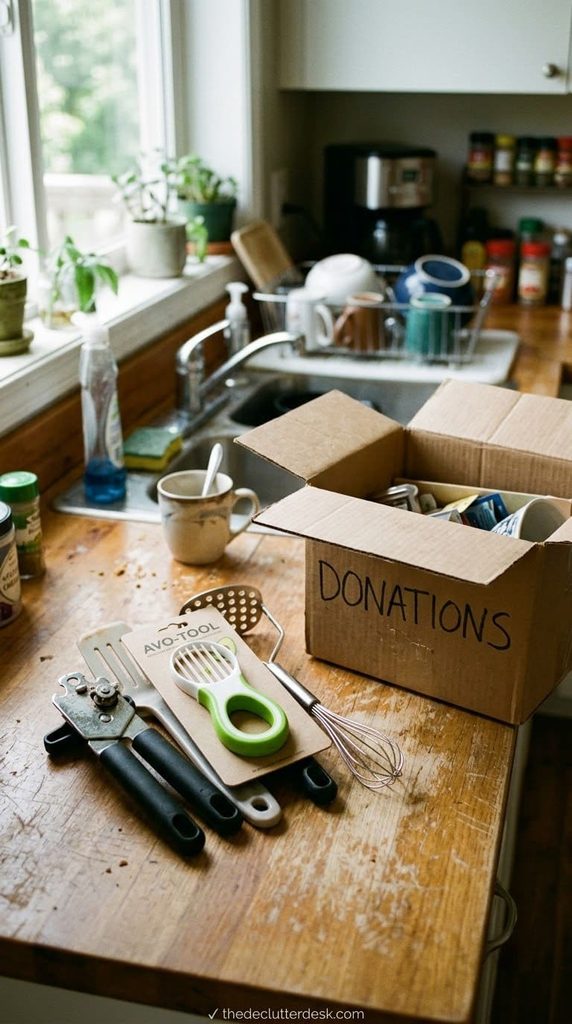
Here’s the part most kitchen storage advice skips entirely. You can install every divider, riser, and turntable on this list and still run out of room if you own 4 can openers and a novelty avocado slicer you’ve used exactly once.
Purging isn’t a separate project from organizing, it’s what makes every other technique on this list actually work at full capacity. A cabinet fitted with a perfect turntable still overflows if it’s holding 3 sets of measuring cups nobody remembers buying.
But nobody wants to hear that before buying the fun stuff, the dividers and turntables feel like progress in a way that throwing out a chipped mug doesn’t.
How to do it right: pull every item out of one drawer or cabinet at a time, not the whole kitchen at once, and sort into keep, donate, and toss. If you own more than one of something that isn’t a genuine backup (extra ice cube trays, a second garlic press), one of them goes.
The common mistake: buying organizing products before purging, which is backwards and expensive, since you end up buying dividers sized for a drawer that’s still 30 percent full of stuff you don’t actually use. Purge first, measure second, buy third.
A real test that works: if you haven’t touched an item in over a year and it’s not seasonal (holiday bakeware, a turkey roaster), it’s very likely dead weight. I still have a fondue set from a wedding gift a decade ago that I finally donated last spring, and I genuinely have not missed it once.
Renter-friendly note: donate to a local thrift store or Habitat for Humanity ReStore rather than tossing anything functional, kitchen gadgets in good condition are exactly what those donation centers can actually resell.
Why these 7 work together, not as a one-time fix
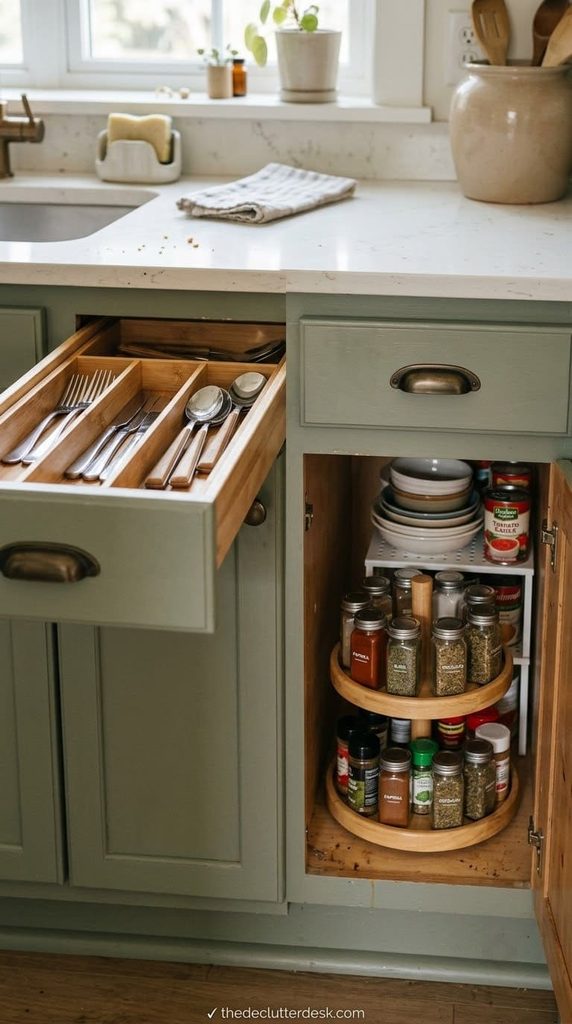
None of these techniques create physical square footage. What they actually do is convert wasted volume, the vertical air above short items, the blind corner behind a cabinet door, the gaps between round containers, into volume you can see and reach.
That distinction matters because it changes what “maintenance” even means here. You’re not fighting entropy with willpower, you’re fighting it with a system that makes putting things back correctly the easy option instead of the hard one.
The techniques that fail fastest are the ones installed without the maintenance habit attached, a lazy Susan nobody spins back to its labeled zones, dividers nobody re-adjusts when tools change. Pick 2 or 3 to start with this weekend, not all 7 at once, and let the rest follow once the first few actually stick.
FAQs
What’s the cheapest way to make a small kitchen feel bigger without a renovation?
Purging duplicates costs nothing and usually has the biggest single impact, since it’s the multiplier that makes every other technique work at full capacity. After that, a basic wire drawer divider or a $15 lazy Susan for a corner cabinet gives the most usable space per dollar spent.
Do drawer organizers actually save space or just make things look neater?
Both, but the space savings is real, not just visual. Dividers convert stacked, competing items into fixed lanes, which means fewer items get pushed to the back and forgotten, and forgotten items are exactly what leads to buying duplicates you already own.
How often should I redo a drawer or cabinet organization system?
Do a quick check every 3 to 4 months, not a full teardown, just confirming dividers are still in the right spots for what’s actually stored there now. Habits and tools change, and a system built for last year’s cooking routine drifts out of alignment if nobody adjusts it.
Is it worth buying matching containers for decanting, or do mismatched jars work fine?
Mismatched jars work fine functionally and cost less, they just won’t nest against each other as tightly as uniform square containers, so you lose some of the air-space reclaim that’s the whole point of decanting. If budget is tight, prioritize matching containers for your highest-volume staples first.

Products We Recommend
This post contains affiliate links. We may earn a commission on qualifying purchases at no extra cost to you.
SpaceAid Bamboo Drawer Dividers with Inserts and Labels, 4 Dividers with 9 Inserts (17"-22" Natural)
This is the direct fit for technique #1, spring-loaded bamboo dividers that expand from 17 to 22 inches with smaller inserts for building custom compartments inside a single drawer.
Shop Now
Copco 18 Inch Lazy Susan Turntable Organizer, Nonslip Rotating Cabinet Organizer
The exact tool behind technique #4, an 18-inch non-skid turntable sized to make a deep corner cabinet's dead zone fully reachable in one spin.
Shop now
Amazon Basics Space-Saving Stackable Metal Kitchen Cabinet Organizer Shelves, Set of 2
A direct match for technique #5, stackable wire risers that create a second usable shelf level above short items like mugs and canned goods.
Shop nowNever miss an update — choose TheDeclutterDesk as your preferred source on Google.
How it works: Tap the button below to open Google's settings page, then check the box next to TheDeclutterDesk.
Tap the checkbox to turn it blue — that's how you know it's set.